See Intro to captions in Final Cut Pro for background information.
You can check the approximately 20 languages supported by macOS translation by going to System Settings > General > Language & Region and click on the Translation Languages… button.
Ready…
- Create or import captions for your project. See Create captions in Final Cut Pro and Import captions into Final Cut Pro.
- Edit the captions as necessary. See Edit caption text in Final Cut Pro.
- The text content in each caption will translated to your chosen language(s). Captions can be joined and split in Final Cut Pro: see Adjust and arrange captions in Final Cut Pro.
- The text style and formatting of the translated captions will be inherited from the original captions, and you can change this using the Inspector. See Format caption text in Final Cut Pro.
Set…
- Drag the project (or compound clip) with finished captions from the Final Cut Pro event and drop it onto the captionTranslator window. (The caption’s language will be recognized from the role assigned to your captions.)
- Choose a language or languages to translate your captions to.
- Use the + button to add additional languages.
- Use the – button to remove languages that you don’t need.
- Click the Manage… button to download (or remove) the available macOS languages. This opens System Settings > General > Language & Region > Translation Languages… for you:
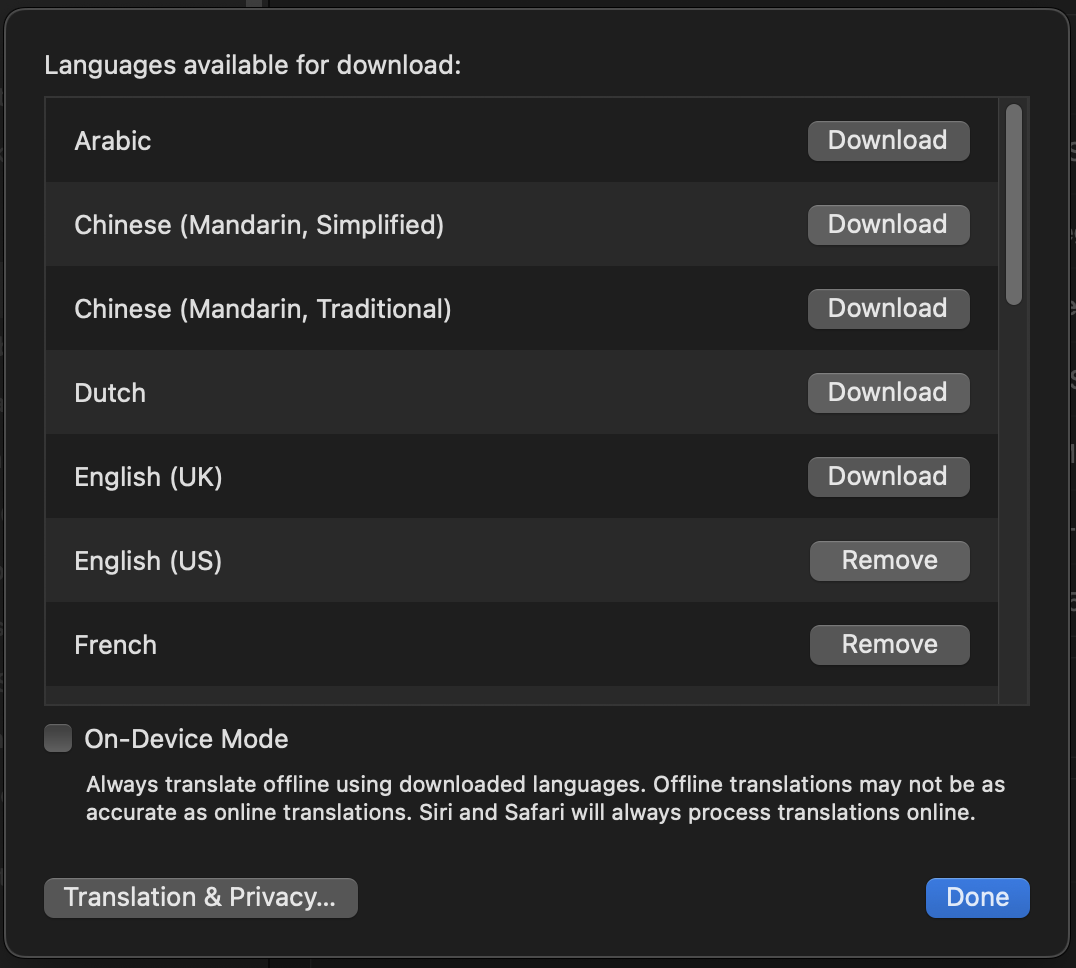
Tip: The downloaded languages are available to every app on your Mac.
Go!
- Click the Go! button.
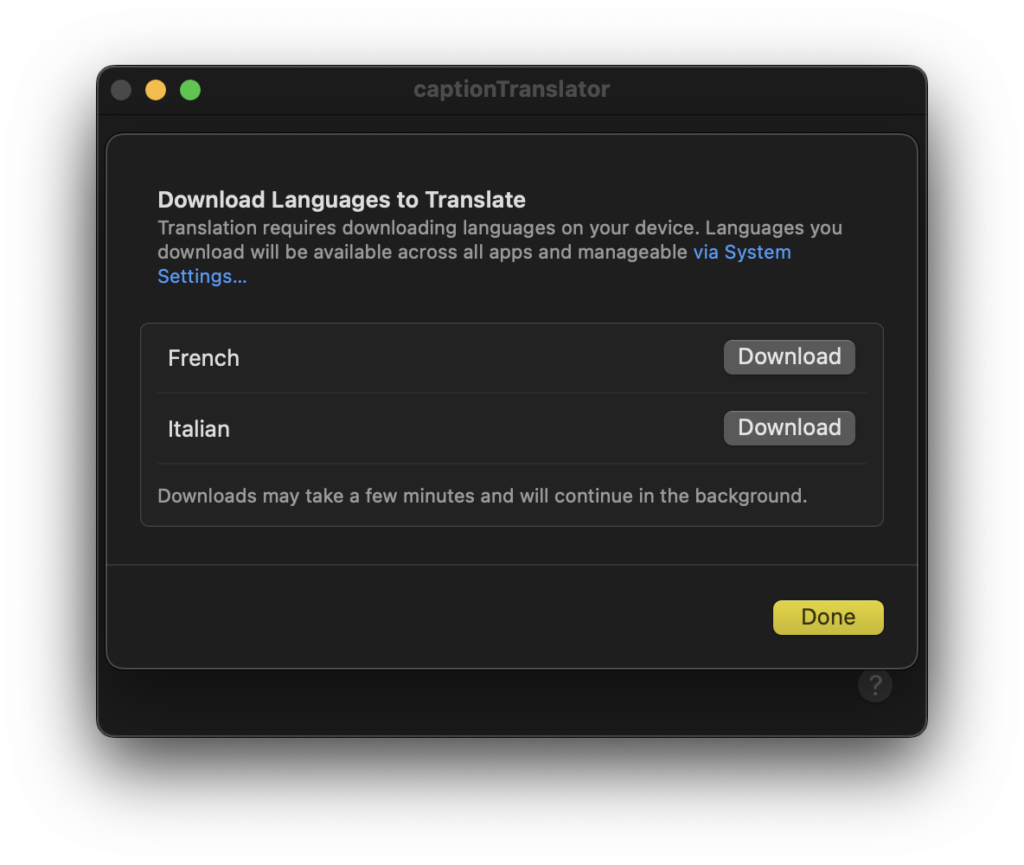
- macOS will determine which languages need to be downloaded. Click the Download button to download and install the necessary language models.
- After translation, choose which Final Cut Pro library you want to add the new project to.
- You can edit and adjust the new captions, then export captions if needed. See Export captions in Final Cut Pro.
- You can change which caption version is displayed in the viewer by changing the active language Role. See Show or hide captions in Final Cut Pro.
IMPORTANT: Some effects may not be present in the new project returned to FCP from captionTranslator because they are not in the XML sent to captionTranslator. For example, Magnetic Mask information is left out of the XML. As a work-around, you can copy the translated caption tracks into the original project.
- Open the project created by captionTranslator.
- Select a caption in the caption track that you want to copy. If you want to copy multiple caption tracks, hold down the Shift key and select a caption in the other tracks.
- Chooses Edit > Select All to select multiple captions, then choose Edit > Copy.
- Open the original project, and move the CTI to the start of the first caption. Then choose Edit > Paste to add the copied caption track(s) at this position in the timeline.